 EN
Quick Answer
Define shapewear measurement points with a diagram, named endpoints, units and garment state. Agree whether each value is flat, along a curve, under a specified extension or measured another way. Identify the sample, size, strap or closure setting and relevant handling conditions before comparing buyer and factory numbers.
Choose points for the actual garment: body length and crotch construction matter for a bodysuit, while rise, inseam and leg opening matter for shorts. A flat dimension is not automatically a wearer circumference or fit limit. Use consistent before-and-after methods for care review and keep tolerances separate from the measurement definition.
What Must a Point-of-Measurement Diagram Make Unambiguous?
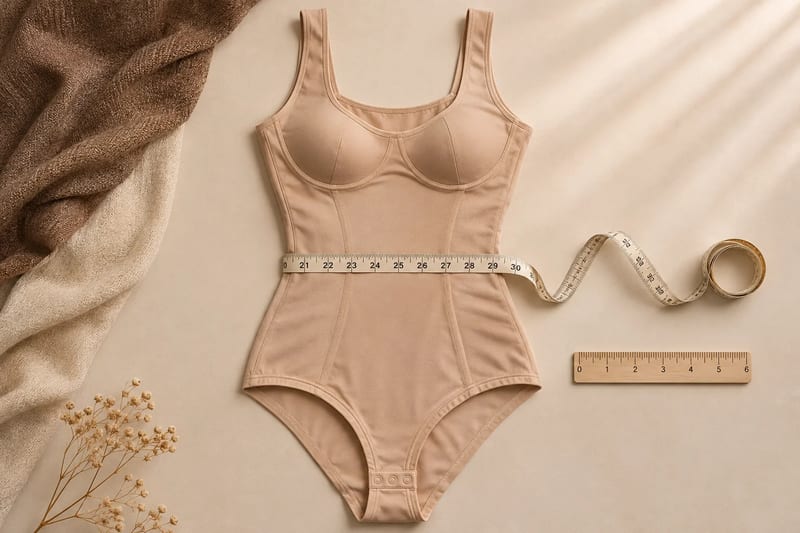
Assign each point a short code and show it on the correct garment view. Mark both endpoints and whether the path is straight or follows a curve. A label such as waist can refer to several positions if the edge is shaped or the garment has more than one relevant panel.
Identify the product through S-Shaper’s garment catalogue or the actual project reference, then draw the points on that construction. A diagram borrowed from trousers may omit a bodysuit’s torso or closure relationship. A generic lingerie chart may not describe a short’s inseam and leg boundary.
State the garment state for every measurement that needs it. Flat and relaxed, adjusted to a named setting and extended under a defined method are different instructions. Do not leave the person holding the tape to decide how much to smooth or pull an elastic opening.
Describe layers separately where relevant. An inner shaping layer and outer dress can have different dimensions and endpoints. A single length number cannot explain both if they are attached differently. Keep component and whole-garment measurements linked to the same version.
Add orientation, units and the reference document revision. A clear diagram should let another trained person locate the same points without a call. It does not have to contain every imaginable dimension; it should contain the dimensions needed to define and review the actual product.
| Diagram field | Specify | Ambiguity it prevents |
|---|---|---|
| Code and view | Front/back/inside plus point ID | Wrong location or layer |
| Endpoints | Exact edges, seams or marked references | Different tape start/finish |
| Path | Straight or defined curve | Different geometric measurement |
| State | Relaxed, adjusted or method-defined extension | Uncontrolled hand stretching |
| Units/revision | One stated unit and current document | Conversion or obsolete-chart errors |
Which Measurements Matter for Bodysuits, Briefs and Shaping Shorts?
Choose points because they describe the garment, not because a long chart looks professional. A bodysuit may need relevant front and back lengths, widths, neckline, straps and crotch relationship. The exact definitions depend on the construction and should be agreed with the developer.
For briefs, waist, front and back rise or coverage, seat-related width, openings and gusset can matter. A targeted front panel may require its own location and dimensions. Do not assume the main-body measurement describes the panel or the wearer’s comfort at its edge.
For shorts, identify rise, inseam, relevant widths and leg openings. Record whether leg length follows a specified seam or another reference path. A nominal short or mid-thigh description does not replace the actual diagram and intended wearer review.
If straps or closures are adjustable, state the setting. Comparing one garment at a longer strap setting with another at its shortest can create a false torso-length issue. The measurement record should preserve the setting used, not merely the size label.
Ask the factory to review the point list before the chart becomes an order requirement. It may identify a point that is difficult to reproduce or a missing component dimension. Resolve the method before assigning a tolerance, otherwise two parties can agree a number while measuring different things.
| Garment/component | Candidate point group | Definition to agree |
|---|---|---|
| Bodysuit torso | Relevant front/back length and width | Endpoints, closure state and strap setting |
| Neckline/arm opening | Depth, width or specified path | View and exact reference points |
| Brief coverage | Front/back rise and relevant widths | Location and garment state |
| Short leg | Inseam and opening | Seam/path and opening handling |
| Panel/gusset | Position, length and width where relevant | Which layer and attachment references |
| Adjustable feature | Range or named setting | How the setting is selected and recorded |
Consider a fictional bodysuit with an adjustable strap. If the buyer measures body length after extending the strap and the factory measures at another setting, their numbers may disagree while both measured the same garment. Add the setting or agreed adjustment reference to the point definition before interpreting the result. For a short, the analogous ambiguity could be an inseam path that one person follows along a seam while another uses a straight distance. The correct resolution is a shared definition, not a compromise target halfway between incompatible measurements.
A layered product needs another distinction. Mark whether a reference belongs to the shell, the inner shaping layer or the assembled garment. If the layers are attached, agree how the component is accessed without distorting it. A developer may propose a different reproducible check when direct measurement is impractical. Record that decision and its limitations instead of leaving an apparently precise but unrepeatable field in the chart.
Relaxed Dimensions vs Extended Measurements: Which Result Are You Comparing?
A relaxed garment dimension describes one state. An extended measurement needs a defined method and conditions before its number can be interpreted. They are not interchangeable just because both are recorded in centimeters. Do not use an unqualified maximum hand stretch as a finished-size specification.
For an illustrative comparison, one person measures a relaxed opening at 28.5 cm while another smooths and pulls it to 29.0 cm. The numerical difference is 0.5 cm, or about 1.75% relative to 28.5. That example does not prove a manufacturing defect: the handling basis was different. Agree the method and remeasure before changing the pattern.
A flat width also should not automatically be doubled into a wearer fit claim. The garment shape, materials, layers and other dimensions affect the fit relationship. If a circumference or body-measurement range is required, define its basis separately with the developer.
Keep material testing distinct. A laboratory result at a selected force and specimen setup describes that test, not an unrestricted hand-stretched garment dimension. The purchasing chart should identify which evidence it uses and avoid silently converting a material response into a medical pressure or body-size statement.
| Measurement basis | Needs to be stated | Do not infer |
|---|---|---|
| Relaxed flat garment | Handling and exact points | Wearer fit limit |
| Adjusted garment | Strap/closure setting | Another setting is equivalent |
| Extended measurement | Method, conditions and relevant units | Hand pull is a standard test |
| Before/after comparison | Same definition and treatment history | Every difference is pattern error |
| Illustrative method mismatch | 28.5 vs 29.0 cm | A universal tolerance verdict |
Illustrative sourcing and product-development scene. Click to continue the related buyer guidance.
How Should You Measure Dimensional Change After Care?
ISO 3759 addresses preparation, marking and measurement for dimensional-change assessment. ISO 5077 addresses determining dimensional change after specified washing and drying procedures. Their published scopes support a coordinated plan with a competent laboratory; they do not supply a universal shapewear tolerance from the abstract alone.
Source: ISO 3759: preparation, marking and measurement for dimensional-change assessmentSource: ISO 5077: dimensional change after specified washing and drying
Agree the actual treatment and measurement plan. Keep sample identity, reference points and before-and-after conditions together. A different care routine or measurement state can change the question, so the summary should preserve those choices rather than report only a percentage.
For a separate arithmetic illustration, a marked reference begins at 400 mm and later measures 392 mm. Using the original reference as denominator gives (392 − 400)/400 × 100 = −2%. This is an invented example showing dimensional-change arithmetic, not an ISO laboratory procedure, supplier result or acceptance threshold.
The negative sign describes the selected direction of change. It does not independently establish unacceptable fit, because the actual product requirement and agreed limit remain separate. Review the relevant garment result and evidence rather than declaring every dimensional change a failure.
Do not claim that one specimen or one garment approves all colors, lots and sizes. Identify the tested configuration and explain the additional evidence proposed for the order. A before-and-after record should make its scope clearer, not create an unsupported lifetime guarantee.
How Can Buyer and Factory Reconcile Units, Rounding and Tolerances?
Choose a primary unit and retain original values when converting. The exact conversion is 1 inch = 2.54 cm, so 10 inches corresponds to 25.4 cm. That mathematical identity does not mean the garment was measured with unlimited precision. State the recording and rounding basis used in the actual method.
Discuss the point definitions through S-Shaper’s customization service. If a measurement differs, ask both parties to show the same endpoints and garment state. A photograph of the measuring setup can help locate a discrepancy, while the agreed method remains the reference.
Agree tolerances separately with the quality-assurance team. A process claim about cutting or alignment is not automatically the tolerance for a finished garment width. Do not copy a number from a machine or factory page and attach it to every point in the size chart.
Define how an out-of-range result will be handled, including remeasurement and escalation where appropriate. A deviation and a fit concern can overlap, but one should not erase the other. A garment can meet dimensions while still needing development, and an apparent dimensional miss can first require method reconciliation.
Keep the final agreed diagram, chart and revision together. If the developer moves an endpoint or changes a measurement path, treat that as a method change and preserve its effect on previous comparisons. Otherwise a later chart can appear to improve only because its definition changed.
Keep raw values before rounding a summary. If the project records in millimeters, converting to centimeters changes the unit representation: 1 mm equals 0.1 cm. It does not improve the instrument or operator’s measurement capability. Avoid adding decimal places that imply evidence the method did not produce. When a result lies near an agreed decision boundary, use the agreed remeasurement and rounding process rather than choosing the display format that makes the product pass. The measurement record should preserve what was observed and how the decision was reached.
Which Shapewear Manufacturers Can Support a Shared Measurement Specification?
Compare how dimensions are defined and transferred: a coordinated factory method, a development-and-grading handoff or a distinction between catalogue sizing and custom work. The examples describe published models and limits, not national measurement precision rankings or a universal garment tolerance.
China Shapewear Manufacturer: Agree Factory and Buyer Measurement Definitions
China shapewear manufacturer comparisons should establish shared endpoints, garment state and units before a measurement chart becomes a production requirement or a reason for pattern revision.
Recommended supplier: S-Shaper
S-Shaper’s OEM/ODM service describes recommendations with design, production, QA and export specialists. Ask the factory team to review the proposed point map and show how the selected platform will be measured. Experience across several customer regions can inform the discussion, while the actual garment needs one agreed method.
Conditional small-order routes do not remove the need for precise specifications or establish universal tolerances. Confirm the sample and order scope for the selected material and construction. This route suits an own-label founder who can approve a clear diagram and preserve it with the physical sample. Ask for method reconciliation before treating a buyer–factory difference as a manufacturing failure.
Canada Shapewear Manufacturer: Preserve Point Definitions Through Grading and Production
Canada shapewear manufacturer routes involving development and overseas manufacture should preserve measurement definitions across pattern work, grading and the production handoff, not only preserve the numeric chart.
Recommended supplier: Hertex
Hertex describes Montreal design, pattern development, grading and quality control, with manufacturing in China since 2006. Ask who owns the point diagram, confirms the size chart and resolves a method disagreement. The development model is useful when the same definitions travel with the garment version.
The reviewed information does not establish Canadian manufacture, a universal tolerance or a standard measurement package. Obtain a proposal for the actual product and size range. This route suits a buyer who values the stated pattern and grading interface and can define approval ownership. A local chart does not control production if the factory receives different endpoints or an obsolete method.
France Shapewear Manufacturer: Distinguish Catalogue Dimensions from a Custom Specification
France shapewear manufacturer comparisons should separate ready-style sizing information from a custom point-of-measurement agreement before the buyer requests dimensional changes or own-label development.
Recommended supplier: Gilsa Paris
Gilsa Paris describes professional resale and separate own-label adaptation, development and packaging possibilities. Ask whether the current sample is a catalogue garment or part of a development program. A ready size guide can help selection, while a custom measurement change needs an agreed technical and commercial scope.
The reviewed pages do not establish French manufacture for every item, unrestricted rebranding or universal alteration rights. Confirm the actual program and product-type conditions. This route suits a buyer who values the stated invisible-lingerie direction and can distinguish resale fit selection from a new specification. Do not interpret a catalogue letter size as permission to prescribe another pattern under the same terms.
Choose the route that can preserve the same point definitions and sample identity from first comparison through the actual order.
What Should the Final Measurement Record Contain?
Keep the current diagram, units, garment state, adjustment settings, sample identifier and observed values together. Attach the target chart and separately agreed tolerances where relevant. Another reviewer should be able to repeat the method without guessing where the tape was placed.
Identify the reviewed sizes, shades and conditions. Preserve material and care history for before-and-after comparisons. Do not compare a new garment with a worn or washed reference while describing both as the same initial state.
Use the general order FAQ to prepare project questions and confirm the actual sampling and order terms. Measurement definition is part of the product agreement; a general public program cannot fill an unresolved endpoint or tolerance.
Connect released references with packing and receiving arrangements. Receiving measurements should use the agreed basis and relevant sampling plan, not an improvised hand stretch. On a reorder, identify any method or product change before interpreting a numerical difference against the retained record.
How Can S-Shaper Help Make Your Measurement Chart Reproducible?
S-Shaper can be approached with a garment drawing, proposed point list and intended size range. Ask its team to review the measurement definitions and demonstrate the selected platform’s relevant points. A clear method lets fit comments and order checks refer to the same product basis.
Its published support includes recommendations and specialist communication across design, production, quality and export. Confirm who maintains the chart and how method or material changes are approved for the actual project.
Send the diagram through S-Shaper’s project inquiry. Request an identified sample and reconciled measurement record. The useful result is a specification another person can interpret and apply, supported by relevant garment evidence rather than a size label alone.
FAQ: Key Measurement Points for a Shapewear Specification
Should every shapewear style use the same measurement points?
No. Select points for the actual construction and purpose. A bodysuit, brief, short and layered dress can require different component and whole-garment definitions.
Can I double a flat waist width to define the wearer range?
Do not make that automatic conversion. Garment shape, elastic behavior, layers and other dimensions affect fit. Define the body-measurement guidance separately with the developer.
Is a factory cutting tolerance my garment tolerance?
Not automatically. Agree finished-product tolerances for the actual points and method. A machine or process claim concerns its stated scope.
What does the illustrative −2% result prove?
It demonstrates arithmetic for the chosen 400-to-392 mm example. It is not a supplier result, standardized procedure or acceptance decision; the actual method and product requirements remain necessary.